Setup Guide
The Editor is optionally included with copies of Finmer. If you don't have a copy yet, you can download it from the official website or GitHub Releases, or if you prefer, compile and run your own copy from source.
System Requirements
The following prerequisites must be installed on your computer. If you're using Windows 10 or later, all of these are already preinstalled. Other operating systems such as Linux or macOS are currently not supported.
- Windows 7 or later, 32-bits or 64-bits.
- Microsoft .NET Framework 4.8 (download here)
- Visual C++ 2022 Redistributable (download here)
To run the Editor, simply launch the Finmer.Editor.exe program.
Layout
When you first load up the editor, an empty project will be open by default. It looks something like this:
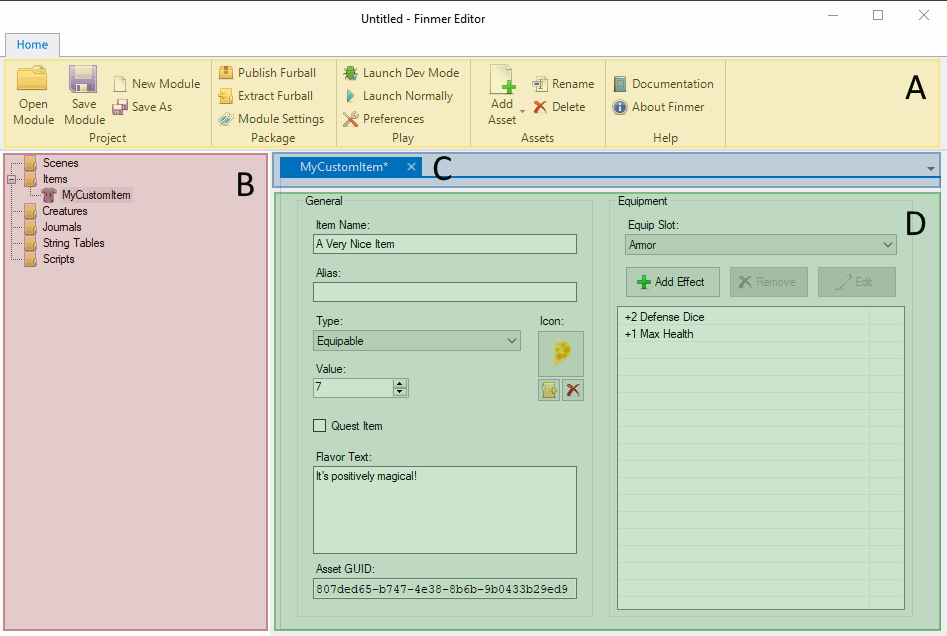
The major sections of the editor window are highlighted in color. They are:
- A - the Toolbar. Has the usual buttons for saving/opening projects. All buttons have tooltips; hover your cursor over them for more information.
- B - the asset list. All assets in your module are listed here, grouped by type. Double-click any item in the list to open it for editing.
- C - open tabs. You can have multiple assets open at the same time; they will be shown here as tabs.
- D - asset editor. This is where you edit your opened assets. The exact options shown depends on the asset type - more on that later.
Configuring the Editor
Before you can get to work, you may need to take one additional step to tell the Editor how to launch the game.
Did you download a full, official release of the game?
Then there's nothing you need to do here; feel free to skip ahead. The editor will be able to figure it out on its own.
Did you compile your own copy from source?
Then you'll need to configure the game paths, so the editor knows where it can find the game and where it should write furball files.
Click Preferences on the toolbar. In the Preferences dialog, change the Game Program Location so that it points to the Finmer game executable. In most cases, this is something like path\to\repository\bin\Release\Finmer.exe. Next, set Working Directory to the folder that contains the Modules folder. In most cases, this is the repository folder itself, e.g. path\to\repository.
Finally, click Accept to save the changes.